Field note
CLI Content Tools for Growth Teams: Automated Branded Assets
Unlock the power of CLI content tools for growth teams. Automate your branded assets effortlessly and scale your content creation today.
For growth teams that need branded images, videos, and PDFs flowing through automated pipelines, a provider-agnostic, template-first CLI content tool is the fastest way to get repeatable, on-brand assets without babysitting a design queue. The verdict is simple: pick a CLI that treats your brand kit as versioned configuration, not a one-off Figma file, and routes generation jobs across LLM and image/video providers through a .env file instead of hardcoded vendor calls.
Try this first: scaffold a project, point it at your brand YAML, and run a dry-run generate command:
npx assets-cli init --brand ./brand.yaml
assets-cli generate --template linkedin-carousel --context "Q3 launch" --wait
Success looks like this: a designId comes back in seconds, your logo and font show up correctly without manual tweaking, and the same command works whether you swap providers next month. Tools built around a CLAUDE.md-style brand context file, a .env provider router, and YAML brand templates give you that repeatability without touching code every time a campaign changes.
Key Takeaways
Provider-agnostic, template-first CLI content tools turn branded asset production into a repeatable, scriptable pipeline instead of a recurring design bottleneck.
| Point | Details |
|---|---|
| Start with the verdict | Use a provider-agnostic CLI tool with YAML brand templates for repeatable, on-brand output. |
| Follow the canonical pipeline | Map brief, creative, caption, compliance, publish, and metrics to specific CLI commands and artifacts. |
| Score tools on five criteria | Weigh brand fidelity, provider routing, JSON automation, publish adapters, and security before committing. |
| Watch quota and compliance during trials | Track renders per campaign and run fail-closed audits before any publish step. |
| Try assets.dev first | Its free plan (10 videos or 100 image renders, 1,000 credits in July) is a low-risk way to test CLI-driven branded asset generation. |
Table of Contents
- What Do CLI Content Tools Actually Do?
- How Does the Automated Content Pipeline Fit Together?
- What CLI Commands Should You Actually Run?
- How Do You Route Between Providers Without Rewriting Code?
- How Do You Keep Automated Output On-Brand and Compliant?
- What Will a Free Trial Actually Cost You?
- How Should You Score a CLI Content Tool for Your Team?
- How Do You Run a Quick Start With assets.dev?
- When Does a CLI-First Workflow Actually Make Sense?
- Ready to Try a CLI Content Tool? Start Here
- Useful Docs and Community Resources to Learn More
- Sources
- FAQ
What Do CLI Content Tools Actually Do?
CLI content tools for marketing take a brief, a template, and a brand kit, then output finished images, videos, or PDFs on the command line, ready for a scheduler or CMS to pick up. That's the whole job. No dashboard clicking, no re-uploading logos for the fifth campaign this month.
The feature set that matters for growth teams looks like this:
- Brand kits and templates, usually YAML-based or synced through a Figma MCP connection, so fonts, colors, and layout rules travel with every render.
- Multi-format output: PNG or JPEG for static posts, MP4 for reels and ads, PDF for carousels and lead-gen assets.
- Presets and pipelines that chain steps (generate, then caption, then schedule) instead of running each as a separate manual task.
- Provider-agnostic routing so you're not locked into one image or video API when pricing or quality shifts.
- Publish adapters that push finished assets straight to a scheduler, CMS, or ad platform import.
- JSON-mode automation with predictable exit codes, so scripts can trust the output instead of screen-scraping a UI.
A typical output run might produce a ten-slide carousel PDF for LinkedIn, a fifteen-second Instagram Reel scheduled for Thursday morning, and a CSV of five ad creative variants ready for a Google Ads bulk import. All three come from the same brand spec, no separate design pass for each platform.
The CLI UX detail that separates a usable tool from a fragile one is what happens on success versus failure. A well-built tool prints structured JSON to stdout when a job finishes and exits with code 0. When something breaks (a missing font, a provider quota hit) it writes the error to stderr and exits 1, so a CI pipeline or cron job knows to stop and alert rather than silently publishing garbage.
How Does the Automated Content Pipeline Fit Together?
The canonical pipeline for CLI-driven content production runs brief to script to creative to caption to compliance to publish to metrics to ads, and each step maps to a specific CLI action or file artifact.

| Pipeline Step | CLI Action or Artifact |
|---|---|
| Brief | scan or init reads the project and drafts a brand/persona spec file |
| Script/copy | Generation call produces caption text tied to the brief's persona |
| Creative | generate command outputs a designId and image/video file |
| Caption | Caption set attached to the creative, formatted per platform |
| Compliance | Audit command checks the asset against brand and legal rules |
| Publish | promote or schedule pushes the asset to a live or queued post |
| Metrics/ads | Analytics pull feeds performance data back into the next brief |
Frameworks structured this way, described in projects like simplicio-loop-marketing, route generation tasks through provider configuration rather than hardcoded API calls, and publish caption sets across multiple platforms from one command chain. Brand identity itself often lives in YAML templates rather than static design files, which is what makes cross-platform repurposing (one asset, five aspect ratios) possible without a designer re-cutting each version by hand.
The handoffs between steps are just files: a JSON brief, a designId reference, a render URL, a caption array. Store the durable pieces in your project the same way you'd store code: a .specs/ folder for brand and persona definitions, a .skills/ folder for repeatable generation recipes, and a bin/ entry point for the CLI itself. Orchestration can be as simple as a cron job hitting generate nightly, or a scheduled GitHub Action that runs the full chain and opens a pull request for human review before anything goes live.
What CLI Commands Should You Actually Run?
Five command patterns cover most of what a growth team needs day to day: scaffold, scan, validate, generate, and schedule.
assets-cli init --brand ./brand.yamlscaffolds a new project and links your brand spec.assets-cli scaninspects an existing repo or CMS export and drafts a starter brand file.assets-cli check --file ./creative.pngvalidates an asset against brand rules before anything publishes.assets-cli generate --template ig-reel --context "product launch" --generate-imagesproduces a render and returns a designId.assets-cli schedule --file designId_8821 --slide all --response-type jsonqueues the asset for publish.
Flags worth knowing: --wait blocks until the render finishes and prints the result inline, useful for quick manual checks. Skip it in a batch job and the command returns immediately with a job ID you poll later, which keeps a CI pipeline from timing out on a slow video render. --response-type json forces machine-readable output instead of a human-friendly summary, which matters the moment you're piping output into a Node or Python script.
A one-shot flow for a weekly ad refresh might look like this: run generate with --wait, capture the designId field from the returned JSON, then immediately call schedule with that ID and a target date. Wrap both calls in a shell script, add error handling on non-zero exit codes, and you've got a workflow that runs unattended. CLI tools built for multi-file, repeatable marketing tasks are explicitly designed around this kind of chaining, which is the whole point of using a command line instead of a dashboard.
How Do You Route Between Providers Without Rewriting Code?
The fix for vendor lock-in is a routing layer that maps task types (image render, video render, LLM copy) to concrete providers through a .env file or a PROVIDERS.md reference doc, so a provider swap is a config edit, not a code change.
A PROVIDERS.md file typically documents which provider handles which task, expected rate limits, and fallback order if a primary provider is down. The .env file holds the actual API keys and provider selection flags that the router reads at runtime. Each provider adapter behind that router has three jobs: render the asset, check remaining quota before spending it, and fall back to a secondary provider if the primary fails or throttles.
Folder layout tends to follow a predictable shape: brand and persona specs in .specs/, reusable generation recipes in .skills/, provider adapter code in lib/, and the CLI entry point in bin/. That separation means a new hire can update brand colors in .specs/brand.yaml without ever touching the adapter code that talks to your image provider.
For connecting outward, most teams wire the CLI to analytics, a CMS, or ad platforms through Zapier hooks, MCP integrations, or direct HTTP adapters. Composable CLI workflows that pull CRM, ad spend, and content performance data into one command chain, without manual exports between dashboards, are what make automated ad-generation loops practical. Credentials belong in a secret manager or your CI provider's encrypted secrets store, never hardcoded in a script or committed brand file.
How Do You Keep Automated Output On-Brand and Compliant?
Run a pre-publish audit on every asset and fail closed on any critical compliance error. That means a broken brand check should block publishing, not just log a warning.
Common gates worth automating:
- Trademark and brand watchlist scan (catch a competitor logo or banned term before it ships).
- Caption and headline length limits per platform.
- Prohibited phrase list (legal claims, off-brand language).
- Image safety filter for generated visuals.
- Reading-level target check on generated copy.
- Schema validation on the final JSON payload before it hits a publish adapter.
Operationally, this works best staged: a dry run generates the asset without publishing, a human or automated review checks it against the gates above, and only then does a promote command push it live. Some teams build a self-test command, something like operator doctor --json, that checks provider connectivity, quota status, and brand-file validity before a scheduled job even starts.
Pro Tip: Log every audit failure with the specific rule it tripped, not just "compliance check failed." A vague failure message trains your team to ignore alerts; a specific one ("banned phrase: 'guaranteed results'") lets you fix the brand file instead of the pipeline. One non-obvious way to cut false positives: run your prohibited-phrase list against a sample of last quarter's approved assets first. If it flags things humans already signed off on, the list is too aggressive before it ever touches production.
What Will a Free Trial Actually Cost You?
Free-tier CLI content plans usually give you enough renders to test a real campaign, not just a demo image, so track exactly how many renders each test job burns before committing to a paid tier.
By the numbers: assets.dev's free plan includes videos or image renders sufficient for real campaign tests, with a paid tier at a low monthly cost. Through July, new users on the platform get 1,000 credits instead of the standard 100.
The line items that actually drive cost once you're past a free tier are LLM tokens for copy generation, image API renders, video render minutes, and publish API calls. A ten-slide carousel might cost you one LLM call and ten image renders; a fifteen-second reel might cost one video render minute plus a caption generation call. Track both per campaign, not just in aggregate, or you'll have no idea which asset type is eating your quota.
A sensible trial checklist: generate one asset in each format you actually need (image, video, PDF), check brand fidelity on each, run one full generate-and-schedule chain end to end, and confirm JSON output parses cleanly in whatever script or CI job will call it in production. If all four pass inside your free allotment, you've validated the pipeline without spending a dollar.
How Should You Score a CLI Content Tool for Your Team?
Weigh five criteria: brand fidelity, provider flexibility, automation UX, integration reach, and security handling, and how much each matters shifts with team size.
- Brand template fidelity. Does it support YAML-based specs or a Figma MCP sync, or are you re-uploading logos every campaign?
- Provider-agnostic routing. Can you swap an image or video provider through config alone, with no code change?
- JSON-mode automation and exit codes. Will scripts get clean, parseable output and predictable failure signals?
- Publish adapters. Does it push directly to the platforms you actually use (LinkedIn, Instagram, Google, X, Substack), or dump a file you still have to upload manually?
- Security and secret handling, plus scale testing. Does it support a proper secrets manager, and have you tested it under your real campaign volume, not just a demo?
A small team should weight template fidelity and automation UX heaviest, since you don't have engineering time to patch gaps. An enterprise team should weight integration reach and security handling heaviest, since a bad secret-handling pattern multiplied across dozens of campaigns is a real liability. On template quality paired with genuine CLI and API depth, Assets is built specifically for this evaluation: curated templates that don't look generic, plus the automation hooks growth teams actually need. Copy the five criteria above into an internal RFP and score each candidate tool out of five points per line before you commit to a paid tier.
How Do You Run a Quick Start With assets.dev?
A ten-minute quick-start proves two things at once: brand fidelity holding up across formats, and automation working end to end without manual intervention.
Start by scaffolding a project and adding your brand file:
assets-cli init --brand ./mybrand.yaml
assets-cli generate --template ig-post --context "fall promo" --wait
Check the returned JSON for a designId and a render URL, then open that URL and confirm your logo, colors, and fonts landed correctly. Next, run a dry-run schedule against the same designId to confirm the caption JSON matches your brand voice and the platform-specific formatting is right:
assets-cli schedule --file designId_8821 --response-type jsonAfter the first run, validate four things: brand colors and fonts rendered accurately, captions match your stated persona, the exit code was 0 on success, and a test publish to a staging social account actually posts. If all four hold, the next integrations worth connecting are a CMS through MCP and a Zapier hook into your ad platform. If a render comes back with the wrong font, check your brand YAML for a missing font-family field before assuming the provider is broken. That single check resolves the most common first-run issue.
When Does a CLI-First Workflow Actually Make Sense?
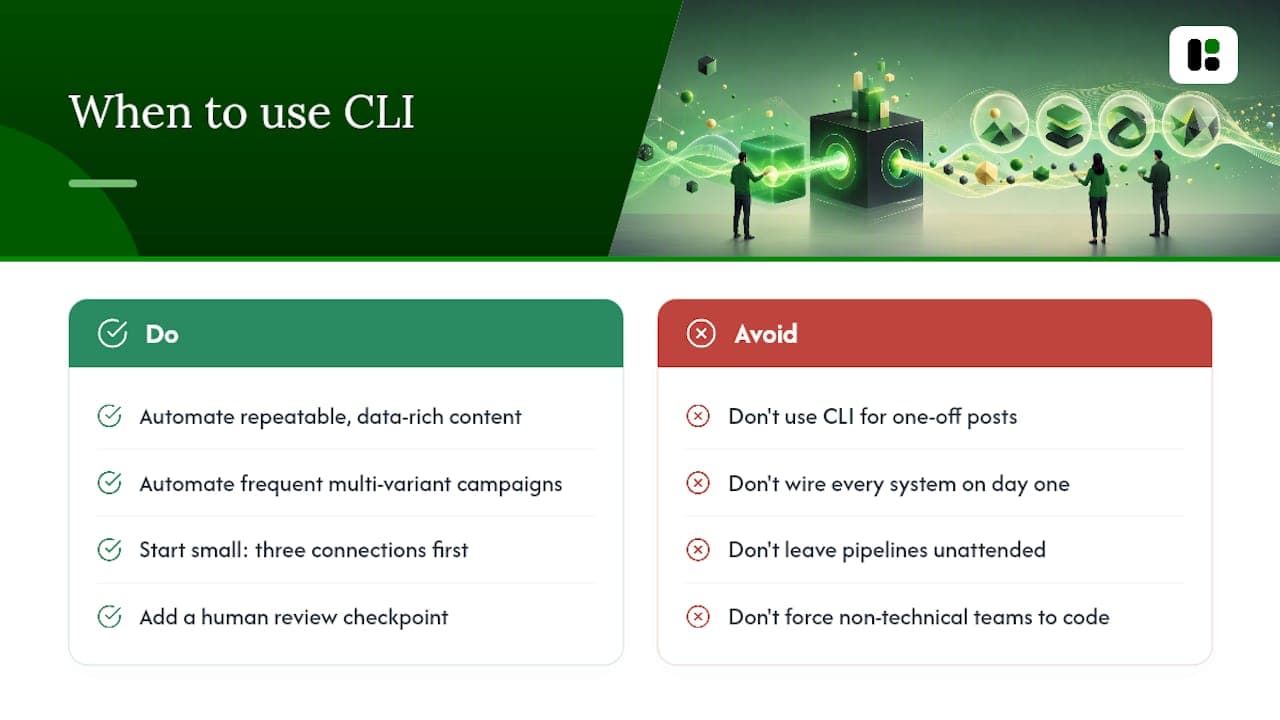
CLI-first content tools earn their place when the work is repeatable, data-rich, and touches multiple files or platforms at once. A single one-off Instagram post for a founder's birthday does not need a CLI. A weekly cycle of twenty ad variants pulled from a product feed absolutely does.
The decision comes down to four factors: how many people touch content creation, how often you generate assets, how many systems need to talk to each other, and how comfortable your team is with config files instead of a visual editor. A five-person startup running one campaign a month can likely get by with a GUI. A growth team pushing daily creative across five platforms is leaving hours on the table every week without automation.
Non-technical teams onboard fastest through saved presets and a brand file they only edit occasionally, treating it like a style guide rather than code. Documented onboarding patterns suggest starting with just three connections, one CRM, one communication tool, one analytics or CMS source, rather than wiring everything on day one. That keeps early wins visible and avoids a stalled six-week integration project nobody finishes.
One honest note on maintenance: no CLI pipeline runs forever unattended without someone checking it. Brand guidelines change, providers deprecate APIs, and a compliance rule that made sense in January can misfire by June. Build in a human review checkpoint even after the pipeline is stable, not because automation failed, but because brands are not static.
Ready to Try a CLI Content Tool? Start Here
Here's the fastest way to see if a CLI content workflow actually fits your stack: run a real campaign through it on a free plan before you commit to anything.
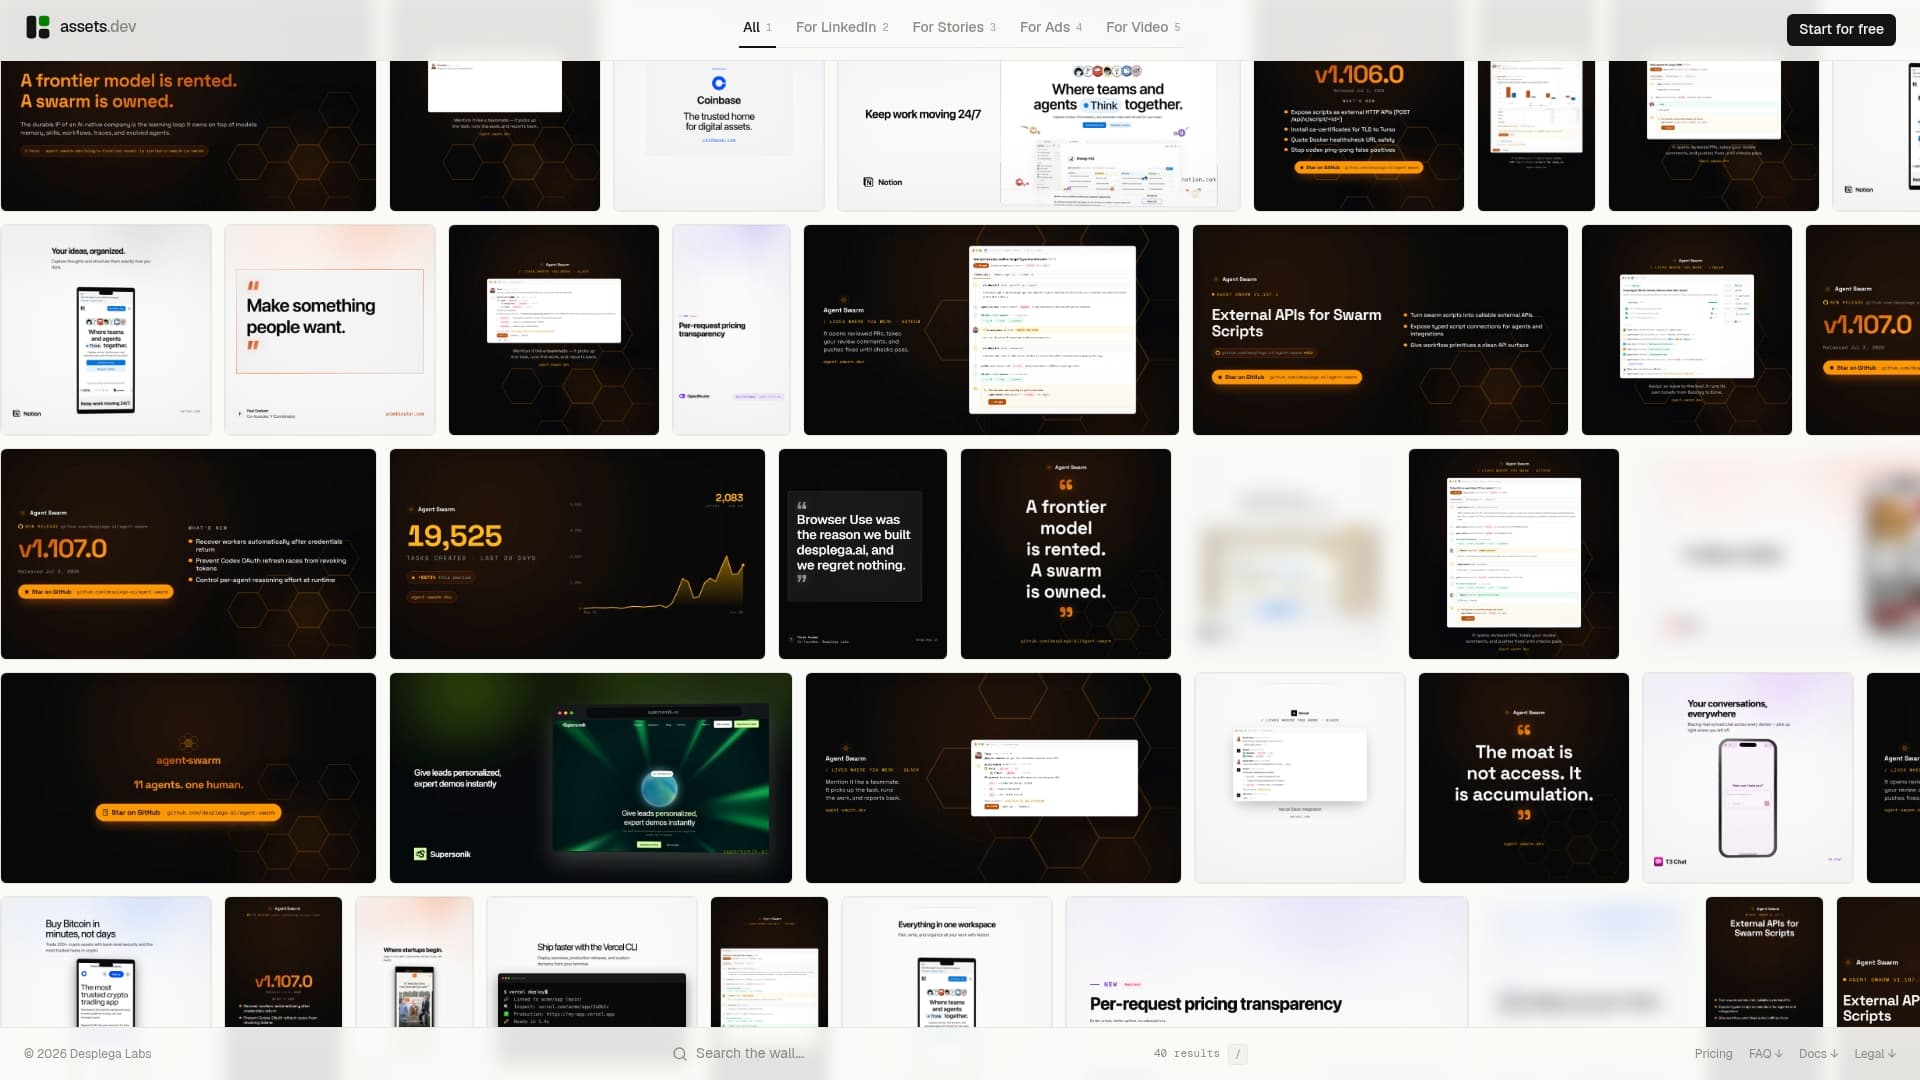
assets.dev gives growth teams the specific thing most CLI content tools skimp on: templates that actually look designed, not generated, paired with the CLI, API, and MCP hooks you need to wire it into an existing pipeline. The free plan covers up to 10 videos or 100 image renders with no credit card required, and through July, new signups get 1,000 credits instead of the usual 100, plenty to run a full campaign test before deciding anything. If you outgrow the free tier, the only paid plan is $9 a month, no tiered upsell maze to navigate.
Start by connecting through the assets.dev MCP integration, scaffold a project with your brand YAML, and run one generate-and-schedule chain against a real upcoming campaign. Check the render against your brand kit, confirm the JSON output parses cleanly in your scripts, and you'll know within an hour whether this fits your workflow.
Useful Docs and Community Resources to Learn More
A handful of sources cover the operational patterns behind CLI-first marketing automation better than generic tutorials do.
- Claude Code for Marketing Teams explains the CLAUDE.md pattern for persistent brand context, useful for any team building governance into a pipeline.
- Claude Code for Marketing Teams: A Guide for Marketers walks through minimal-viable onboarding: one CLAUDE.md, one skill, one MCP connection.
- Claude Code for Marketers: Agentic CLI Workflows covers file-system access patterns relevant to bulk ad generation.
- The simplicio-loop-marketing repository shows a full open-source pipeline mapping brief to publish to metrics.
- The marketmenow framework demonstrates YAML-based brand templates and a ports-and-adapters architecture.
- assets.dev's MCP docs cover CLI, API, and MCP setup for template-based asset generation.
Sources
- Claude Code for Marketing Teams | Tornic | Tornic
- Claude Code for Marketing Teams: A Guide for Marketers | Growth Method
FAQ
What Are CLI Content Tools?
CLI content tools are command-line and API-driven systems that generate branded images, videos, and PDFs from templates, letting marketing teams script and automate asset production instead of designing each piece by hand.
How Is a CLI Content Tool Different From a Design App?
A CLI content tool runs from scripts and integrates into pipelines with JSON output and exit codes, while a design app requires manual clicks in a browser for every asset.
Do I Need to Know How to Code to Use One?
Basic command-line comfort helps, but most CLI content tools, including Assets, use plain YAML brand files and copyable command patterns that don't require programming knowledge.
What Does Provider-Agnostic Routing Mean?
It means the tool maps generation tasks to specific LLM, image, or video providers through a configuration file like .env or PROVIDERS.md, so switching vendors doesn't require rewriting code.
How Much Does a CLI Content Tool Typically Cost?
Free plans usually cover a limited number of renders for testing; assets.dev's free plan includes up to 10 videos or 100 image renders with no credit card, and its paid plan is $9 per month.
What Should I Test First on a Free Plan?
Generate one asset in each format you need, check brand fidelity, run a full generate-and-schedule chain, and confirm the JSON output parses cleanly before committing to a paid tier.